First two things you need to do after opening an account are to input your basic business information and assign user roles and permissions so you can bring the whole eCommerce team to work together.
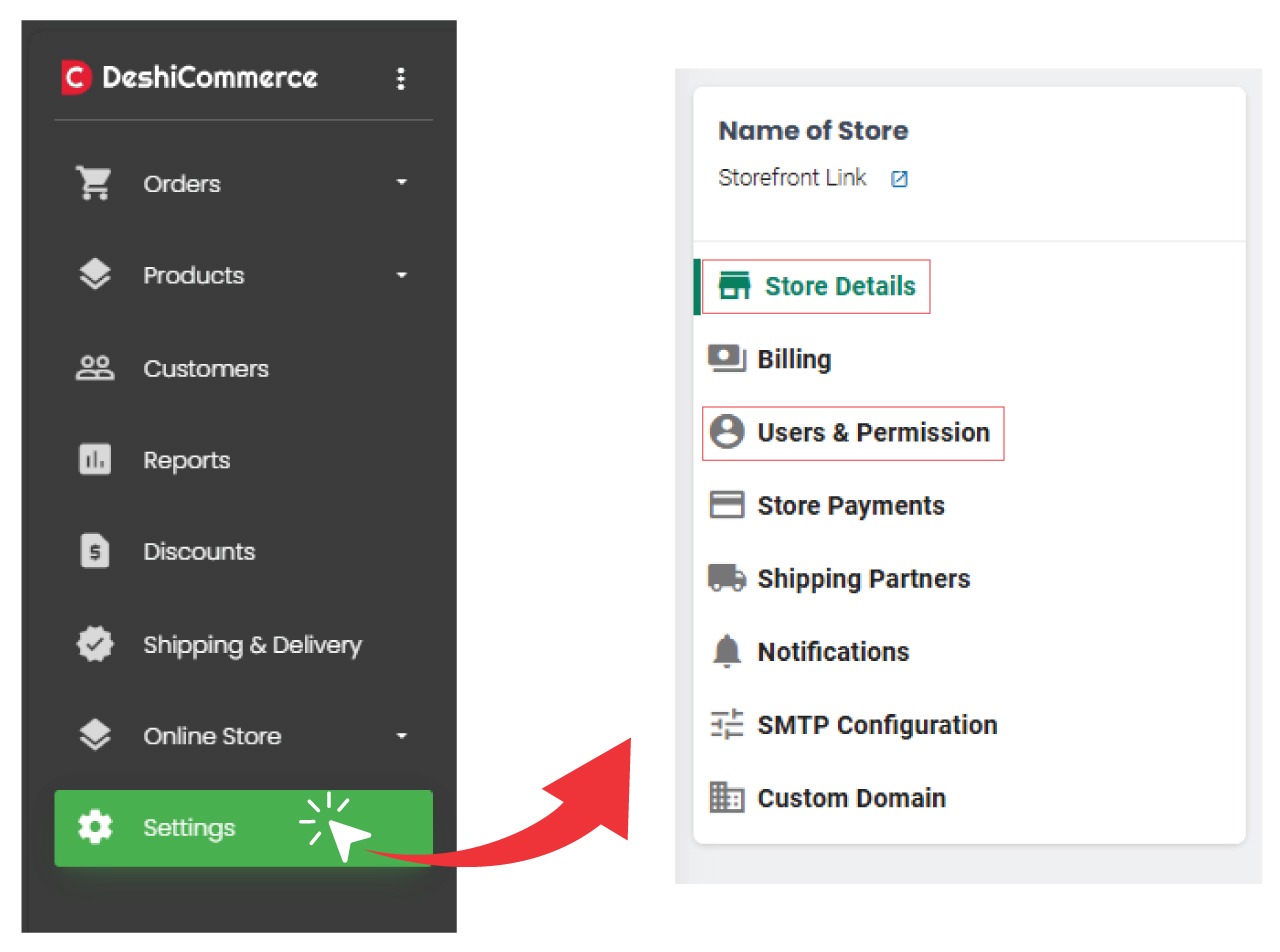
You can do this by going to the settings menu in your account. In the settings menu, there are several sub-settings. You should focus on the item number 1. Store details and 3. Users and Permission.
You can set up the rest later at a convenient time. We highly encourage you to browse the whole DeshiCommerce backend to get familiar and accustomed to it. Feel free to contact our customer support if you have any queries or are facing difficulties. They would be happy to help you.
Setting up Store Details and Information

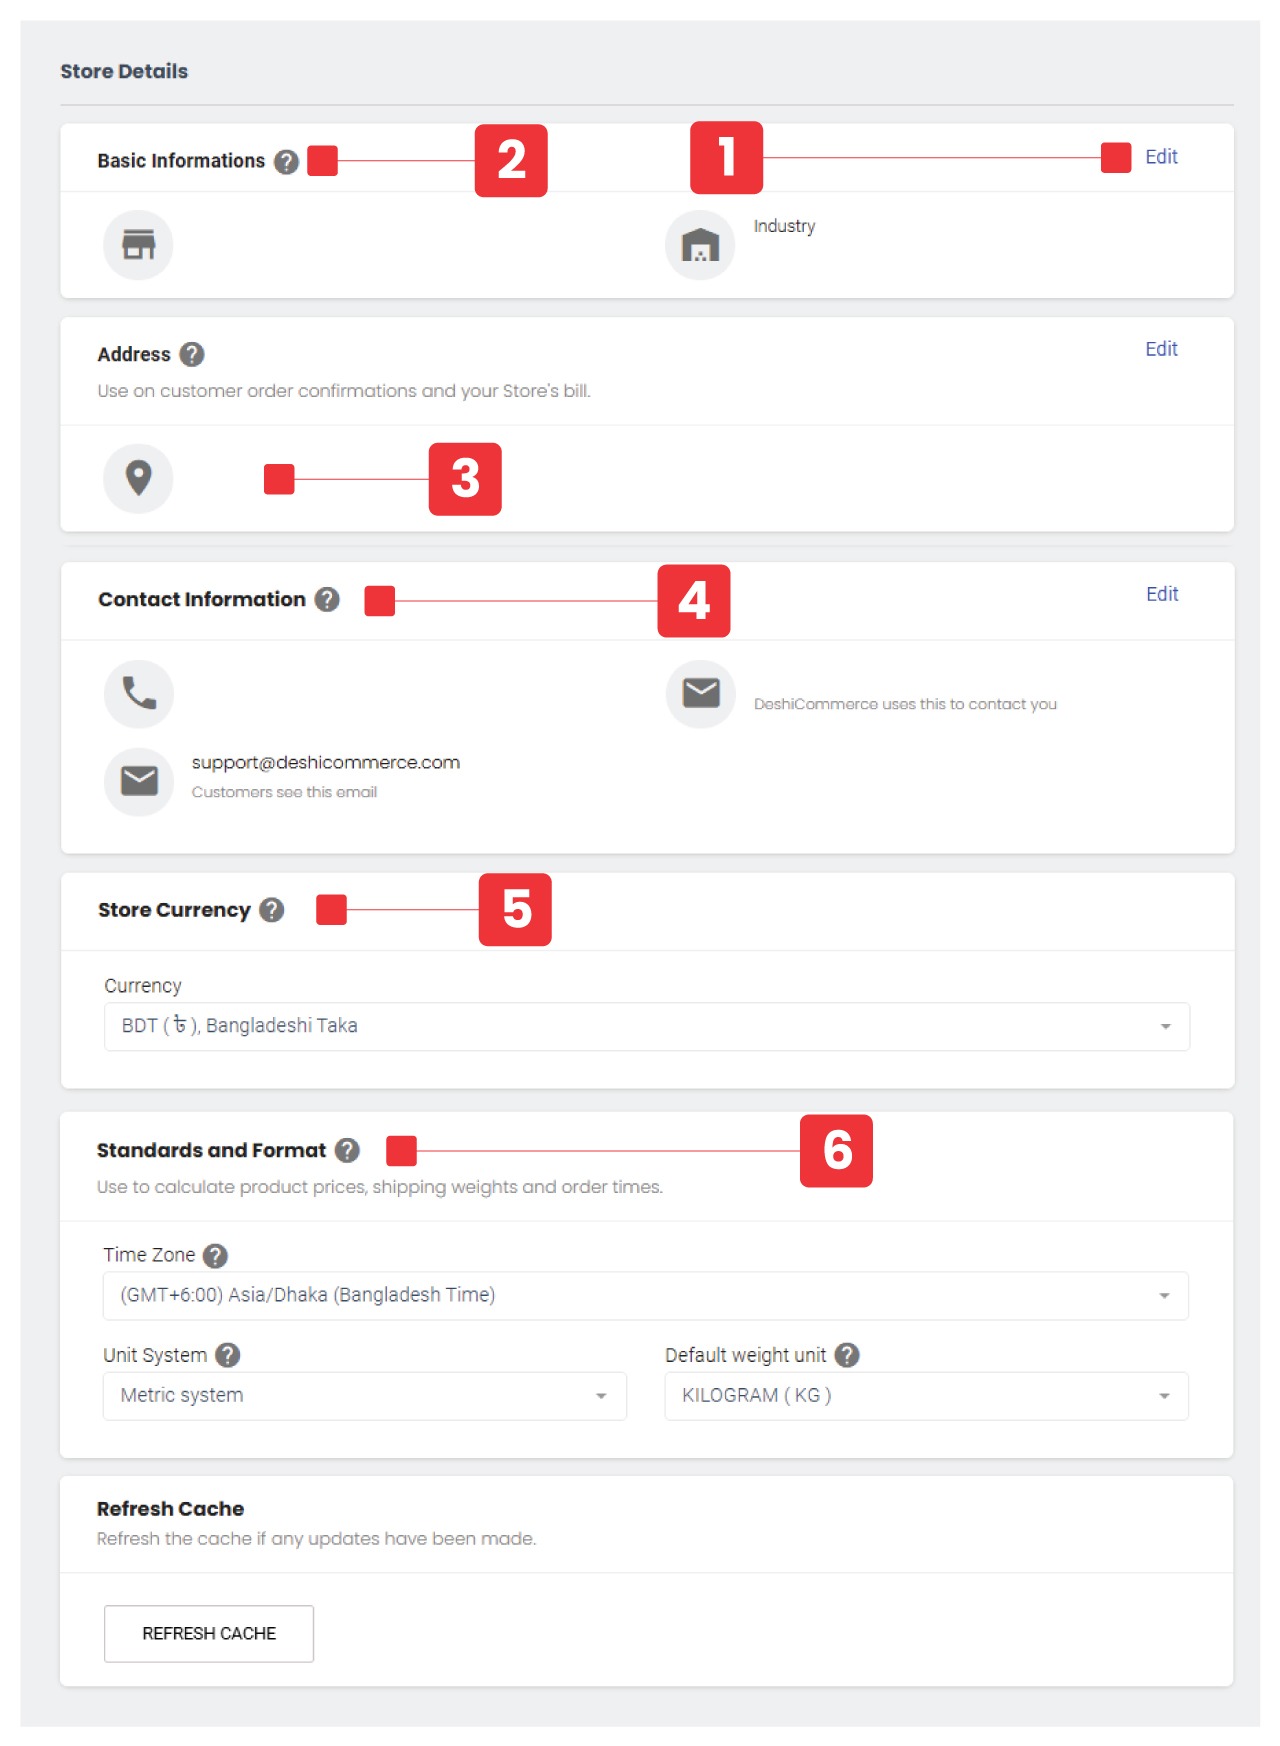
Store details is the place to input your business basic and operational information. You need to input your information as listed below:
- Click on the edit button in each section to start adding information.
- Input your store name and industry category.
- Input your business address.
- Input your business contact information such as mobile phone number. There are two input areas for email addresses. One will be used by DeshiCommerce to contact you (Customers will not see this). The other email address is for public display and interested parties or customers will send you mail to this address.
- Select the appropriate store currency. For example, if your target audience is in Bangladesh, you should select BDT.
- Select the appropriate time zone, unit system, and default weight unit.
Setting up User Roles and Permissions

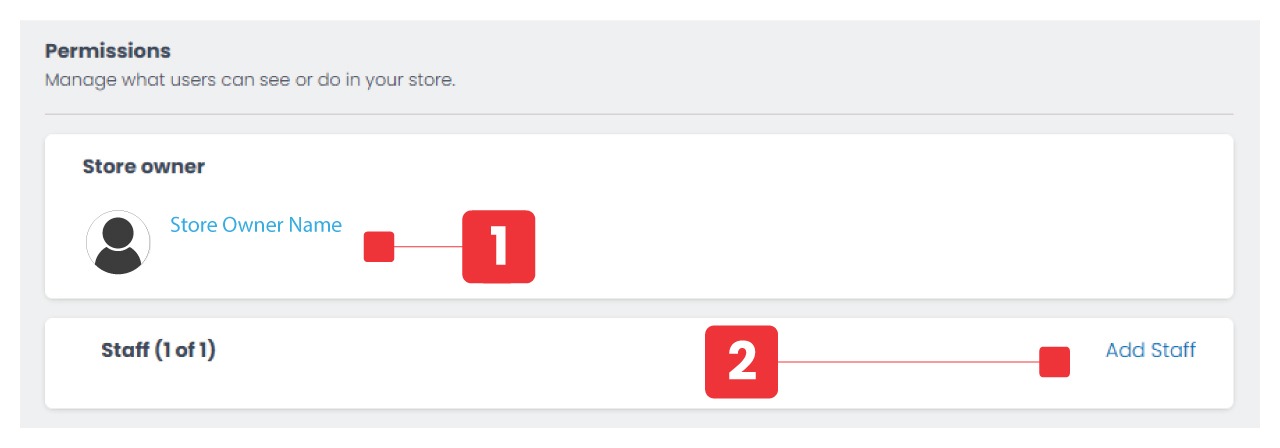
Go to settings > Users & Permissions to view and assign user roles and permissions.
- The owner of the store.
- The list of users you have given access to your store backend. Click on the username to add or remove permissions. Click on the Add staff button to add new users and assign permissions. Now your


